


Every customer is unique, and so are their needs. Sometimes, the default checkout fields in WooCommerce just aren’t enough, especially when your store needs additional input from the customer. Whether you’re asking for an order name, gift message, or delivery date, customizing the WooCommerce Checkout page helps customers to communicate their needs clearly.
In this solution, we’ll show you how to add a Custom Text Field to the WooCommerce Checkout Page and display the custom field value on the My Account > Orders page, order details page, and on the admin order page. It helps customers quickly spot their orders by name, and also makes it easier for store owners to manage and fulfill orders.
Add the Custom Text Field to the WooCommerce Checkout Page
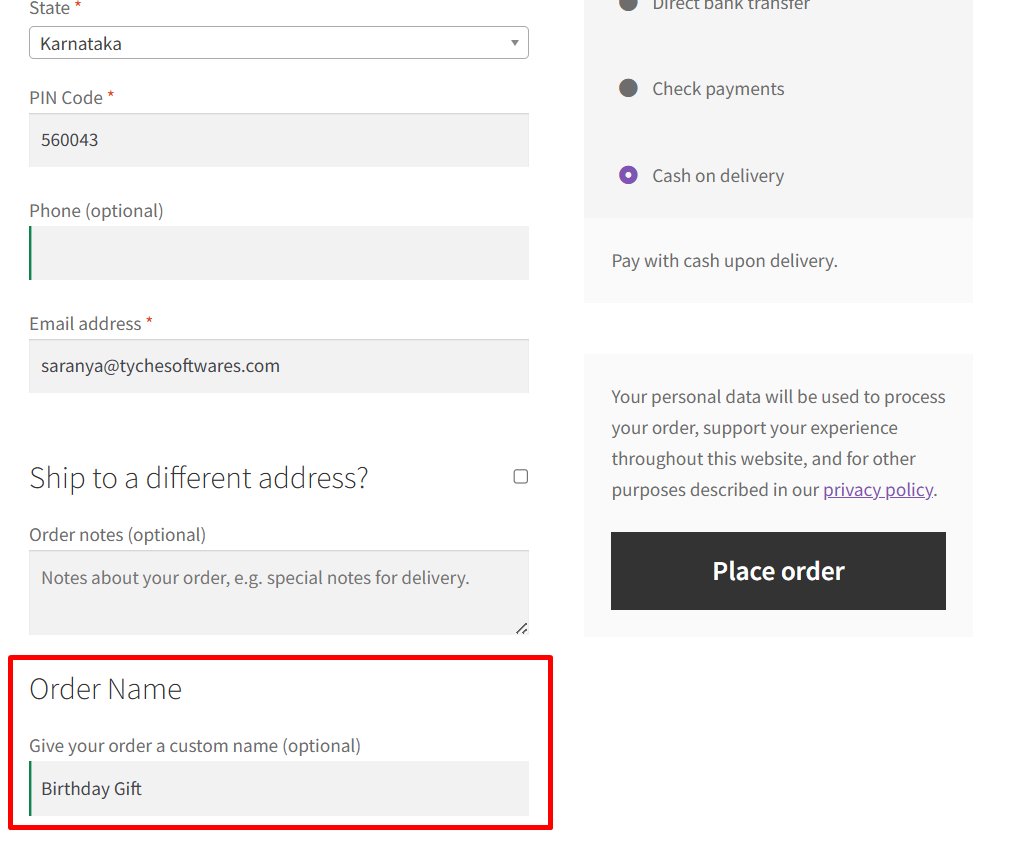
To begin, we’ll add a new custom field labeled “Order Name” right after the order notes section of the WooCommerce Checkout page. To make sure the field isn’t left empty, you can add the validation logic. Next, we’ll save the value entered in the “Order Name” field to the order’s metadata.
// 1. Add "Order Name" field at Checkout
add_action('woocommerce_after_order_notes', 'ts_add_order_name_checkout_field');
function ts_add_order_name_checkout_field($checkout) {
    echo '<div id="order_name_field"><h3>' . __('Order Name') . '</h3>';
    woocommerce_form_field('order_name', array(
        'type'        => 'text',
        'class'       => array('form-row-wide'),
        'label'       => __('Give your order a custom name'),
        'placeholder' => __('e.g., Birthday Gift, Office Supplies'),
        'required'    => false,
    ), $checkout->get_value('order_name'));
    echo '</div>';
}
//Validate the field
add_action('woocommerce_checkout_process', 'validate_custom_checkout_field');
function validate_custom_checkout_field() {
    if (empty($_POST['order_name'])) {
        wc_add_notice(__('Please enter an order name.'), 'error');
    }
}


// Save "Order Name" to Order Meta
add_action('woocommerce_checkout_create_order', 'ts_save_order_name_to_order_meta', 10, 2);
function ts_save_order_name_to_order_meta($order, $data) {
    if (!empty($_POST['order_name'])) {
        $order->update_meta_data('_order_name', sanitize_text_field($_POST['order_name']));
    }
}
Output
The custom field will be displayed on the WooCommerce Checkout page. This allows customers to give their order a custom identifier (e.g., Office Supplies, Birthday Gifts etc).

Add Order Name Column on the “My Account > Orders” Page
Now, let’s enhance the My Account > Orders table by adding a new column that displays the order name.
// 2. Show "Order Name" on My Account > Orders Table
add_filter('woocommerce_account_orders_columns', 'ts_add_order_name_column_to_my_orders');
function ts_add_order_name_column_to_my_orders($columns) {
    $new_columns = array();
    foreach ($columns as $key => $label) {
        $new_columns[$key] = $label;
        if ('order-number' === $key) {
            $new_columns['order_name'] = __('Order Name', 'woocommerce');
        }
    }
    return $new_columns;
}

add_action('woocommerce_my_account_my_orders_column_order_name', 'ts_show_order_name_column_value');
function ts_show_order_name_column_value($order) {
    $order_name = $order->get_meta('_order_name');
    echo !empty($order_name) ? esc_html($order_name) : '<em>—</em>';
}
Output
When the customer places the order, the custom field value is displayed on the Order received page.
The new column will be added to the My Account > Orders table retrieving the custom field value and populating that in the new column as shown below.

Show Order Name in the Order Details Page
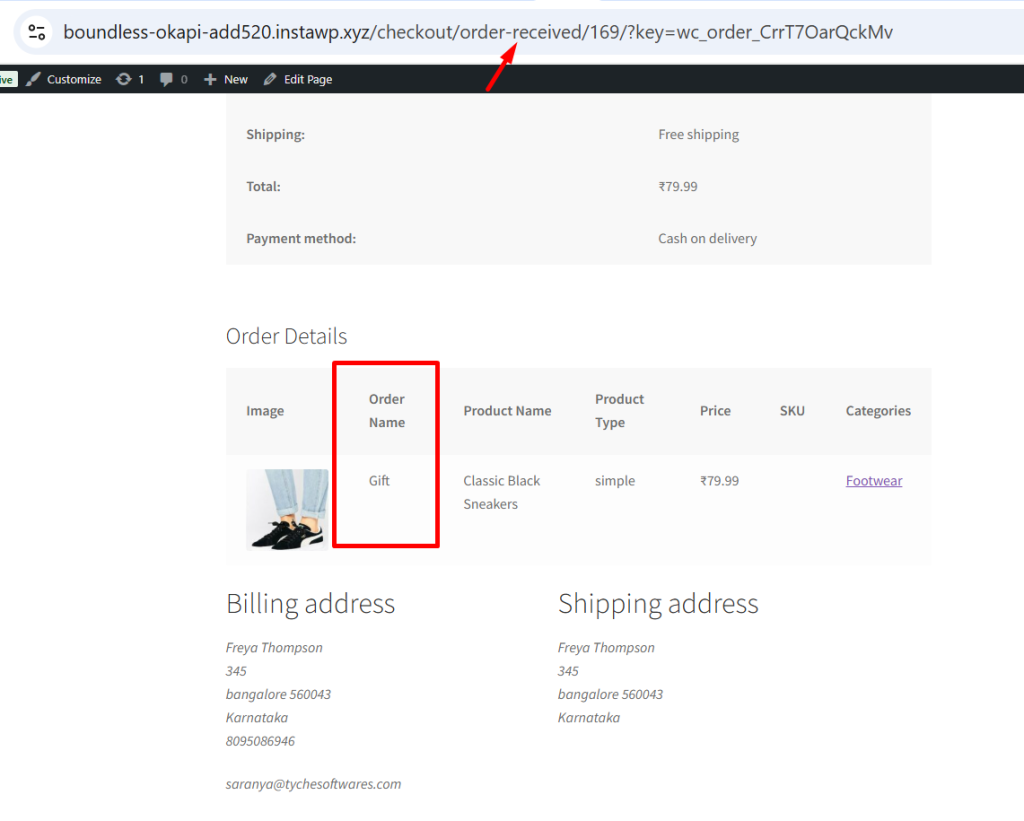
This code adds a custom product details table to the My Account > Orders > View page. Along with product info like image, name, type, price, SKU, and categories, it also displays a new Order Name column.
The Order Name is the value entered by the customer during checkout. Displaying it here helps customers easily identify their orders, especially when they’ve placed multiple orders.
// 3. Display Order Name on View Order Page (after product table)
add_action('woocommerce_order_details_after_order_table', 'ts_custom_view_order_product_table');
function ts_custom_view_order_product_table($order) {
    if (!is_a($order, 'WC_Order')) return;

    $order_name = $order->get_meta('_order_name');

    echo '<h3>' . __('Order Details') . '</h3>';
    echo '<table class="shop_table shop_table_responsive">';
    echo '<thead><tr>';
    echo '<th>' . __('Image') . '</th>';
    echo '<th>' . __('Order Name') . '</th>';
    echo '<th>' . __('Product Name') . '</th>';
    echo '<th>' . __('Product Type') . '</th>';
    echo '<th>' . __('Price') . '</th>';
    echo '<th>' . __('SKU') . '</th>';
    echo '<th>' . __('Categories') . '</th>';
    echo '</tr></thead><tbody>';

    foreach ($order->get_items() as $item) {
        $product = $item->get_product();
        if (!$product) continue;

        echo '<tr>';
        echo '<td>' . wp_get_attachment_image($product->get_image_id(), 'thumbnail', false, array('width' => 50)) . '</td>';
        echo '<td>' . (!empty($order_name) ? esc_html($order_name) : '—') . '</td>';
        echo '<td>' . esc_html($product->get_name()) . '</td>';
        echo '<td>' . esc_html($product->get_type()) . '</td>';
        echo '<td>' . $order->get_formatted_line_subtotal($item) . '</td>';
        echo '<td>' . esc_html($product->get_sku()) . '</td>';
        echo '<td>' . wc_get_product_category_list($product->get_id()) . '</td>';
        echo '</tr>';
    }

    echo '</tbody></table>';
}
Output
When customers click “View” next to an order, it’s helpful to display an additional table with product details, including the custom Order Name. This helps them easily identify and distinguish their orders, especially if they’ve placed multiple similar items.

Show “Order Name” in WooCommerce Admin Orders List (compatible with HPOS)
This snippet adds a new column called “Order Name” to the WooCommerce > Orders admin list.
// 4. Add Order Name Column in WooCommerce > Orders (Admin)
add_filter('manage_woocommerce_page_wc-orders_columns', 'ts_admin_order_column_order_name');
function ts_admin_order_column_order_name($columns) {
    $new_columns = array();
    foreach ($columns as $key => $label) {
        $new_columns[$key] = $label;
        if ('order_number' === $key) {
            $new_columns['order_name'] = __('Order Name', 'woocommerce');
        }
    }
    return $new_columns;
}

add_action('manage_woocommerce_page_wc-orders_custom_column', 'ts_admin_order_column_order_name_value', 10, 2);
function ts_admin_order_column_order_name_value($column, $order) {
    if ($column === 'order_name') {
        if (is_a($order, 'WC_Order')) {
            $order_name = $order->get_meta('_order_name');
            echo !empty($order_name) ? esc_html($order_name) : '—';
        }
    }
}
In the WooCommerce > Orders admin page, a new column titled “Order Name” is displayed beside each order. This helps store owners or staff easily identify orders by the custom name entered by customers.

Adding a single custom field at checkout is useful, but what if your customers need to provide extra info for each product in their cart? With the Product Input Fields for WooCommerce plugin, you can collect custom info for every product they add to the cart. It allows you to add text, number, checkbox, and date fields directly on the product page. These inputs are saved with the order and clearly visible to the admin, making order management even more efficient.

