Table of Contents
“Flowers… are a proud assertion that a ray of beauty outvalues all the utilities in the world.”
– Ralph Waldo Emerson
In these famous words of American philosopher and poet Ralph Emerson lies a lot of truth. Every other commodity pales in comparison to flowers because they possess an undeniable beauty! They are attractive, easy-to-gift, and used for almost every occasion by everyone all around the world. And what’s even better is that the online flower shops have created a niche in the e-commerce market which is ever booming. According to the Petal Republic, from the year 2014 to 2019, online flower shops have grown 11.8%. Even the worldwide landscape for Flower and Ornamental Plants is expected to grow up to 6.3% over the next five years and reach $57.4 Billion USD by 2024.
Now, for customers, there are various things that come under consideration when they decide to buy flowers from an online flower shop. First and foremost, comes the quality and the freshness of flowers. Secondly, the customers are very keen on the price of flowers and love the fact that ordering them online is a matter of convenience. Lastly, Delivery services are just as important to the customers. According to Whidegroup, an e-commerce website development company, Delivery Services, including same-day delivery, matter 77% for customers when they buy flowers from an online store. And this is the reason why it becomes extremely crucial to set up an online flower delivery shop which is highly convenient! Let’s have a look at how to do that with WooCommerce.
How to set up your flower delivery shop Page in WooCommerce?
Your first step is to create a website with the help of WordPress. If you wish to have a hosted solution via WordPress.com you can get started here. However, if you wish to create a self-hosted website, you can download and install the latest version of WordPress. For this post, we’ll be taking the self-hosted route. After installing WordPress, you need to choose a theme for your site. WordPress offers more than 3000 themes. Themeforest also offers some amazing themes and templates that let you change and customize your WooCommerce shop layout with ease, add a continue shopping button in WooCommerce, add pagination, hide products from the shop page, add WooCommerce back to shop button, and even create multiple shop pages. We would also recommend checking out the Astra theme. There’s both a free and a premium version, both are fully compatible with WooCommerce and leading page builders. It’s super-easy to set up a flower delivery store with Astra, especially if you use their readymade Florist template!
The next step to turn your site into an e-commerce platform is installing the WooCommerce plugin. The plus point of this plugin is that it is an extremely versatile platform that can be enhanced with the use of other plugins such as the flower shop delivery WooCommerce plugin catering to your needs. Through this post, we’ll share some of the plugins that will help customize your WooCommerce shop page and enhance your flower store. But before that, you can have a quick look at these steps here in order to get a full understanding of how you’re going to build your WooCommerce flower shop delivery business.
Let’s start by learning how to make use of the existing features from the WooCommerce plugin to set up your online flower delivery shop page in WooCommerce.
1. Product Page
First, we’ll have a look at the Product Page.
a. Setting it up
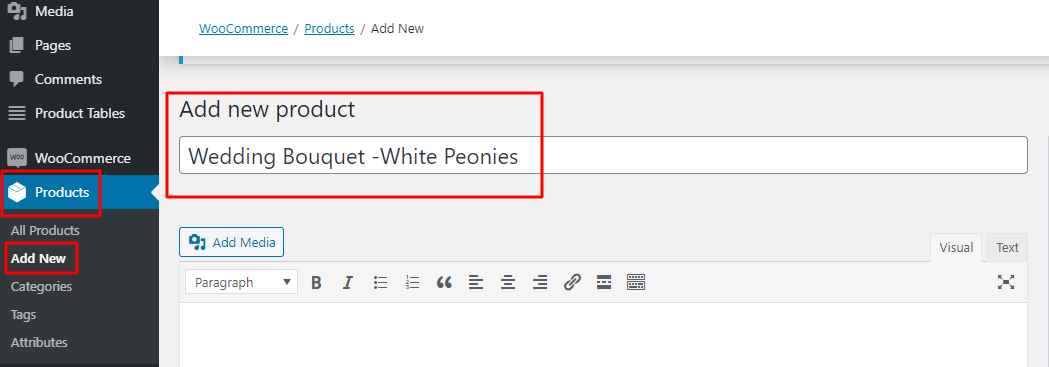
Your flower store needs to have products and for that, you need to add the product on the site. You can go to your WordPress Dashboard, click on Products, and then select ‘Add New’. That’s how your first product will be created. Next, you need to add details around the same. For this, you can enter the name of the product under the ‘Title’, something like ‘Wedding Bouquet- White Peonies’.
After this, you can go to the ‘Product Data’ section where you can enter the price for your product under the ‘Regular Price’ option. If you’re planning to offer the product at a discounted rate during a sale, you can add that price under the ‘Sale Price’ option.
Under ‘Short Description’ you can write a brief description of the product. Make sure to keep it as concise as possible so that the customer does not need to scroll down to read the whole thing. Target accessibility and smoothness of customer experience. You can even do this by writing the description in bullet points!
Lastly, under ‘Product Image’ you will have to upload the best picture of your product. Make no compromise here because customers need to find the picture of the bouquet as close to the real thing in resemblance! Think about the aesthetic of your brand that you wish to showcase to the customer.
Once you’re done you can click on the ‘Publish’ button at the top right corner and And viola! your product is now live on your website.

b. ‘Yours Truly’: Adding a Message Card
For this, you can install Product Input Fields for the WooCommerce plugin. Once activated, you can set several input types such as text, textarea, select, checkbox, color, email, phone, datepicker, etc. You can even customize where exactly you would like to display the message card on the product page. For example, you can choose to add the message card field before the ‘Add to cart button’ or even after it. It also allows you to add fields for individual products as well as all the products!
2. Cart or Checkout Page
Next, we have to take care of our Cart & Checkout Page.
A. Delivery Date and Time slots
Did you know that flowers lose 15% of their value for every extra day spent on traveling them?
For an online flower shop, the most important aspect that can make or break your business is how you deliver your products. And you will only achieve a perfectly delivered item when you know the exact details of the product as well as the order! To know this, your online flower store will require to know the customer’s preferences as well as your availability in terms of delivering the flowers. To do this, you will have to add Delivery Time Slots and Delivery Date Slots to your online flower shop.
1. How will adding these be beneficial to your store?
Adding delivery dates and timeslots to your store can be beneficial in two ways:
For your delivery Woocommerce flower shop page
- Drastic cutback of time spent on managing calls and delivery dates
- A better way of keeping up with customer demand
- An organized schedule that matches your delivery capacity
- Reduces Non-Deliveries since you know what time and date slots are filled
- Saves money on Delivery costs
- More accuracy in terms of completing orders and delivering them on time
For your customers
- Gives them the freedom to choose the specific time and date slots according to their convenience
- Allows them to know when exactly they will receive their flower order
- Increases customer satisfaction when the delivery is on time
- Creates loyalty towards your brand
To conclude, delivery slots allow customers to choose specific time and date ‘slots’ for their delivery. But that’s not it, because as useful they are for your customers, they’re equally important for your online flower shop!
2. How to add Delivery date and time slots to your online WooCommerce flower shop page?
We’re giving you 2 solutions for this question:
a) A solution for capturing Delivery Date and Time slots for your entire order
If you wish to allow your customers to choose a delivery date and time on their checkout page, then we’d recommend you to go with our Order Delivery Date Pro for the WooCommerce plugin.

Once you’ve installed and activated the plugin, you can go to the WooCommerce dashboard > Order Delivery Date > Settings > General Settings. Over here you will find both Date Settings as well as Time Settings. Depending on whatever changes you wish to make you can choose the options accordingly.
For example, if you wish to disable your deliveries on Sundays, you can easily go to Date Settings > Delivery Days and remove Sundays from there. Once you’re done with this, you can click on Save Changes and behold the beauty of this on the checkout page! This is just one example of what this plugin can do for your online flower shop. You can check out several other possibilities of what this plugin can help your flower shop achieve by clicking here.
Lastly, we’d like to add that with this plugin you can even add a Field Note Text on the Checkout page that can say something like ‘We will try our best to deliver your order on the specified date’. This really helps your customers sympathize with your brand and clearly showcases your drive behind offering the best of your services to them.

You can also have a look at our free version called Order Delivery Date for WooCommerce- Lite plugin.
b) A solution for capturing Delivery Date and Time slots separately for each product
If you wish to provide a delivery date and time slots for your online flower shop, you can use our Product Delivery Date Pro for WooCommerce plugin. This plugin will show the Delivery time and date to your customers on the WooCommerce product page.
To Install this plugin, you can follow the same procedure mentioned above for Order Delivery Date Pro for the WooCommerce plugin.
If you’re on a budget and wish to avail of some of the features of this plugin you can also check out our Product Delivery Date for WooCommerce- Lite. You can find the difference between the Pro and Lite versions here!
Still confused about which of these two plugins would be better suited for your online flower shop? You can easily find their features and the difference between them both over here. Happy selecting!
B. The Shipping Scenario
Delivery runs synonymously with shipping and that’s what we’re going to help you configure first!
1) Set Shipping Zones and Shipping Methods
In order to set up the delivery option for your online flower delivery WooCommerce shop, the free WooCommerce plugin allows you to set up a) delivery areas and b) delivery or collection options.
Let’s get into how to set them up:
The first thing you need to do while setting up your online flower delivery shop is decide in what areas you plan to deliver your flowers. This is what we call a ‘Shipping Zone’. To create this, you can go to WooCommerce > Settings > Shipping > Shipping Zones. You need to choose ‘Add shipping zone’ where you will enter the Zone Name and choose the Zone Regions that apply to it. Here, you need to specify the scale of the shipping that your business can manage. Does it cover only particular states within a Country? Does it cover several Countries? Or is it a Transcontinental distribution? All of these come under the Zone regions.
For example, most online flower shops give a ‘Local’ (i.e your Zone Name) option and you can do the same for your store as well! You can further narrow down the Zone regions to a specific zip or postcodes by clicking on ‘Limit to specific ZIP/postcodes’ under Zone regions.

The next thing to do is Select the ‘Shipping Method’ for the zones that you have created. Here, you can give the customers the option to either pick up their order from your store (i.e local pickup), charge them the Flat Rate for the specific zone or provide Free Shipping. To do this, you can choose the Shipping Zone where you will add the Shipping Methods by clicking on ‘Edit’. You can scroll down to ‘Shipping Methods’ and ‘enable’ the Shipping Method for that zone. You can even disable it or if you feel like it, you can create a new one by clicking on ‘Add Shipping Method’. The last thing to do is ‘Save Changes’ and voila your delivery area is set!

2) Offering Conditional Free Shipping
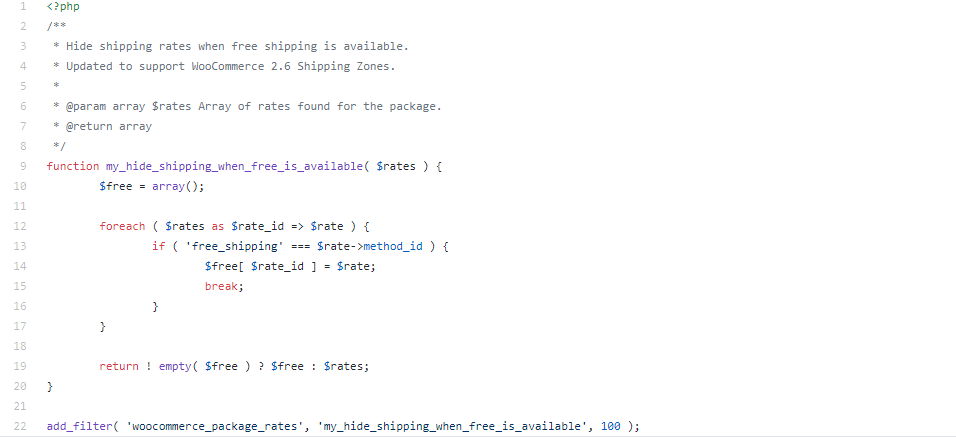
Let’s say that your WooCommerce online flower shop offers free shipping to customers based on a specific condition. For example, you wish to only show the method of ‘free shipping on any order above $50’ to your customers if it’s available for them. You can do this by using the following snippet to hide the other methods!
3) Shipping Address
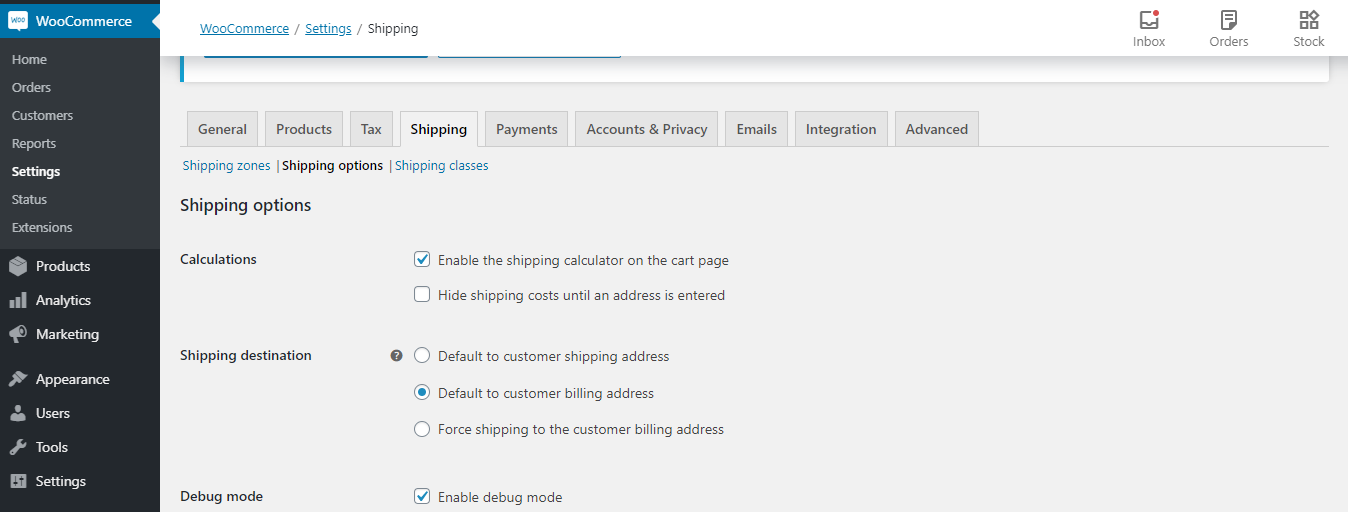
To configure the Billing Details, you can go to Settings > Shipping > Shipping Destination > Default to Customer Billing Address. Over here, you can not only set where you would like the shipping destination to be but also enable shipping calculations for the customers on the cart page.
4) Ship to a Different Address
If the customer wants to ship the order to a different address they need to click on the box every time they purchase a product. To avoid going through so much trouble, you can change this default setting by adding the following code directly to your theme’s functions.php file.
add_filter( 'woocommerce_ship_to_different_address_checked', '__return_true' );
In this way, the ‘ship to a different address’ section can be automatically seen by default on the checkout page.
If you wish to understand some more amazing features of WooCommerce Shipping in detail, you can check our comprehensive guide here.
C. Managing your Delivery drivers
Most of the flower shops in Woocommerce use delivery drivers for their deliveries. Although it seems easy to manage the drivers on your own, your WooCommerce store can help you with this too. The Delivery Drivers for WooCommerce plugin offers better driver management for delivery services. You can add new users as designated drivers, edit orders, and assign a specific driver to order. You can even check out another plugin such as Local Delivery Drivers for WooCommerce.
Have a look at a few online flower delivery shops using the Order Delivery and Product Delivery Date plugins
1. Order Delivery Date Pro for the Flores no Cais from Portugal

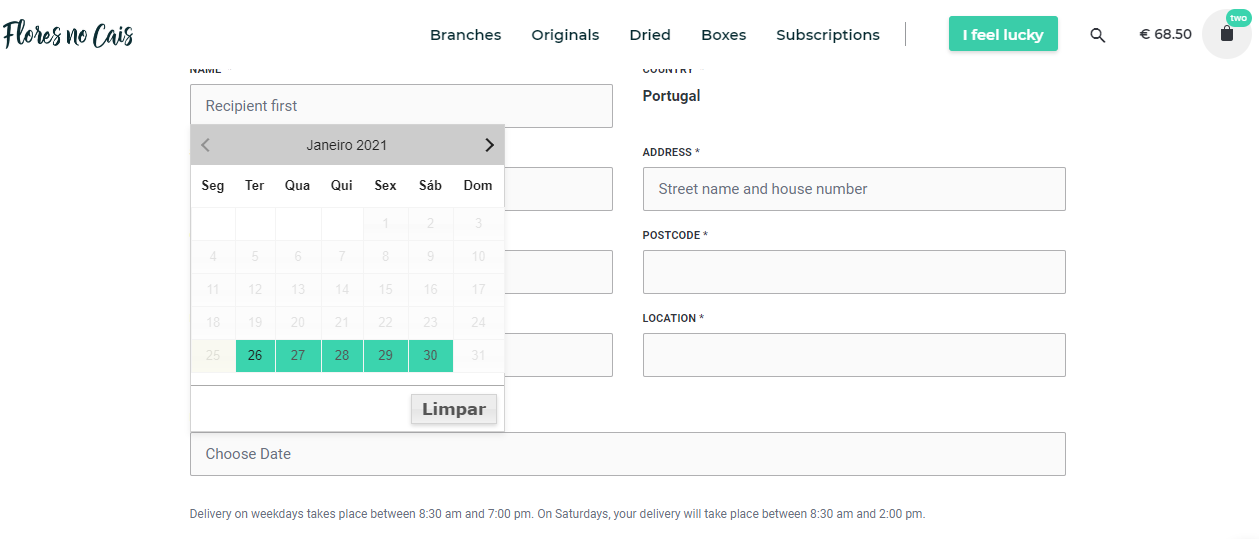
From Farm Fresh Bouquets, flower boxes, Subscriptions to even dried flowers, this online flower shop called Flores no Cais has it all! Have a look at how the Delivery Date appears on their Checkout page –
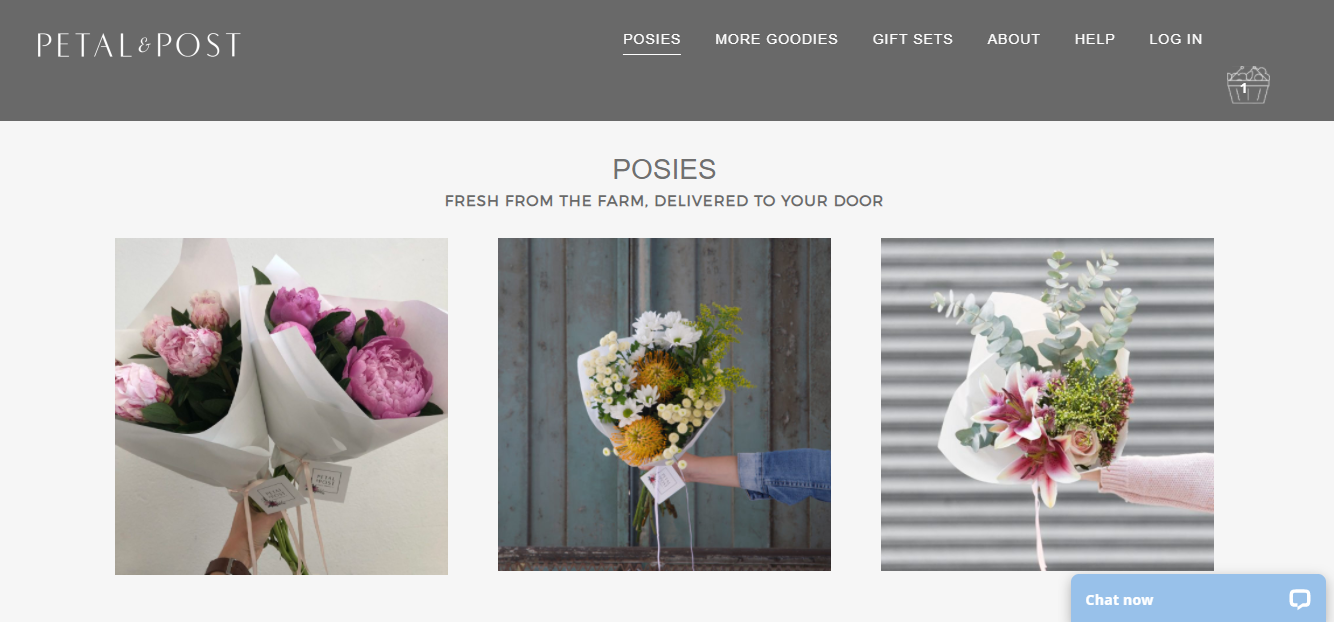
2. Order Delivery Date Pro for Petal & Post from South Africa
Petal & Post is best known as the online flower shop that sells a different posy every day. They also offer subscriptions, pre-orders, and gift-sets!
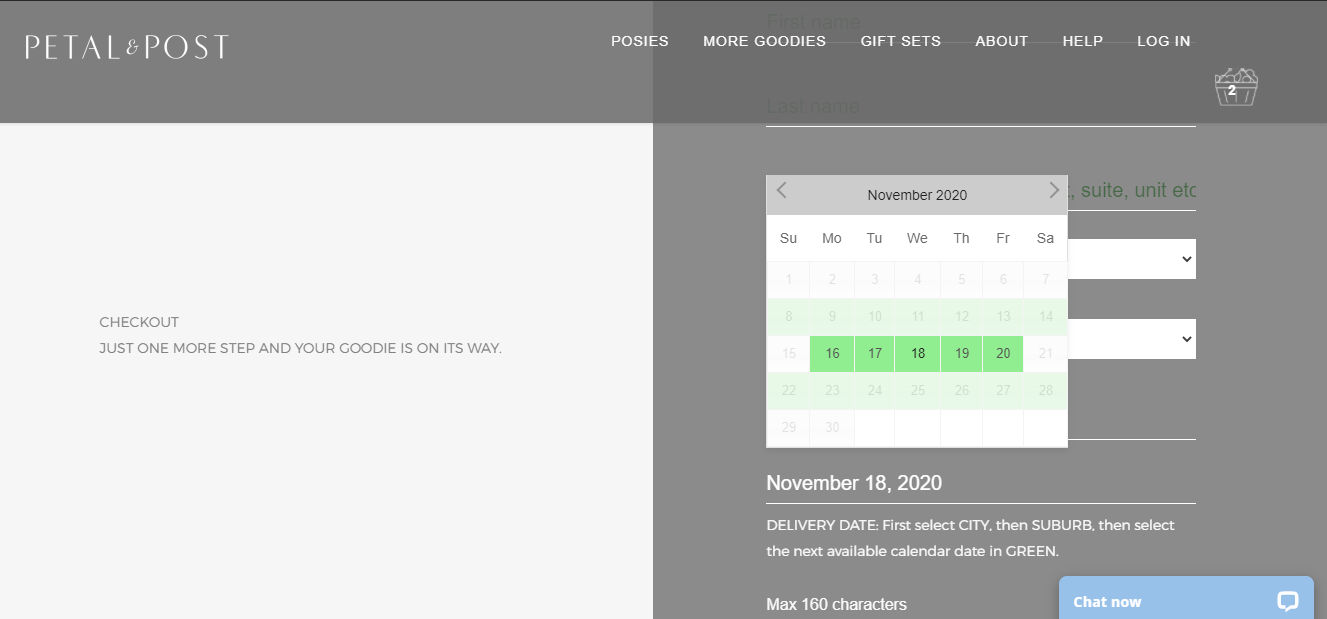
By using Order Delivery Date Pro Plugin, they’re letting the customers select the City, then Suburb, and the available calendar date slots which are highlighted in Green.
3. Order Delivery Date Lite for The Petal Room from Australia
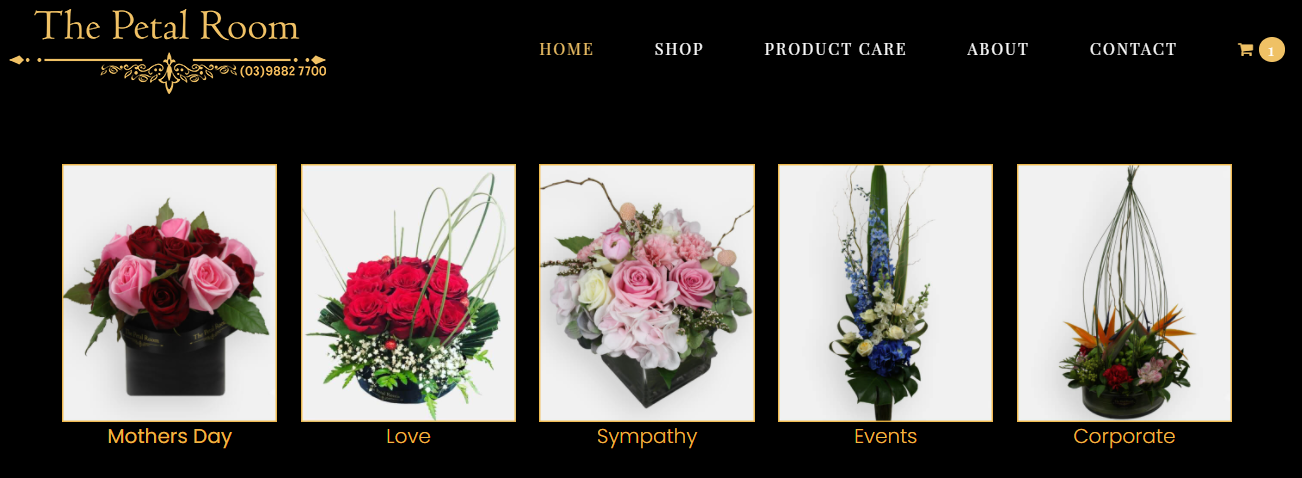
The Petal Room is all about elegant bouquets, arrangements, hampers, roses and so much more! They’re best known for delivering across all Melbourne suburbs.
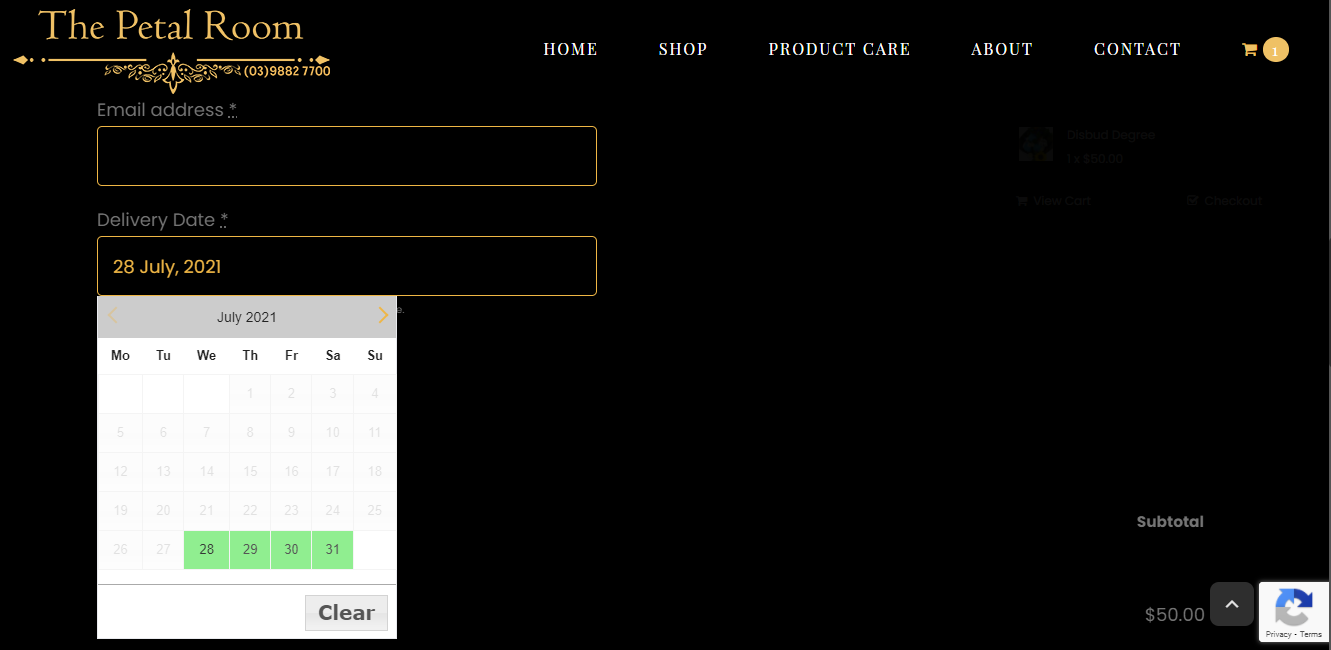
Here’s how they have been using our Order Delivery Date Lite plugin to offer a delivery date option on your Checkout Page:
4. Product Delivery Date Pro for Hello Blooms from Australia
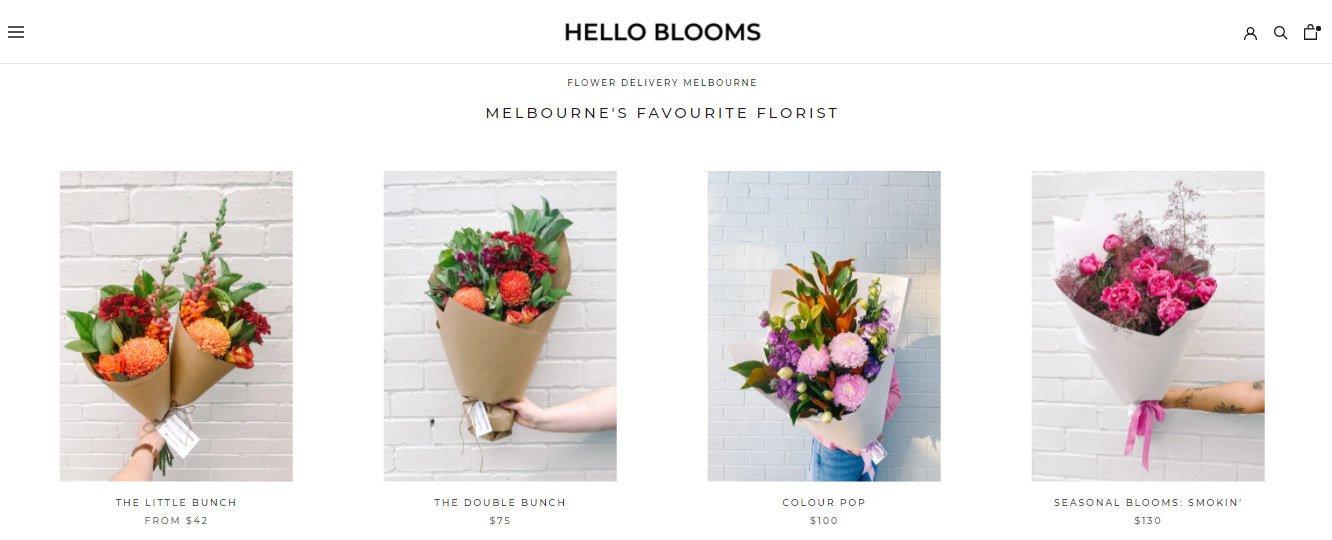
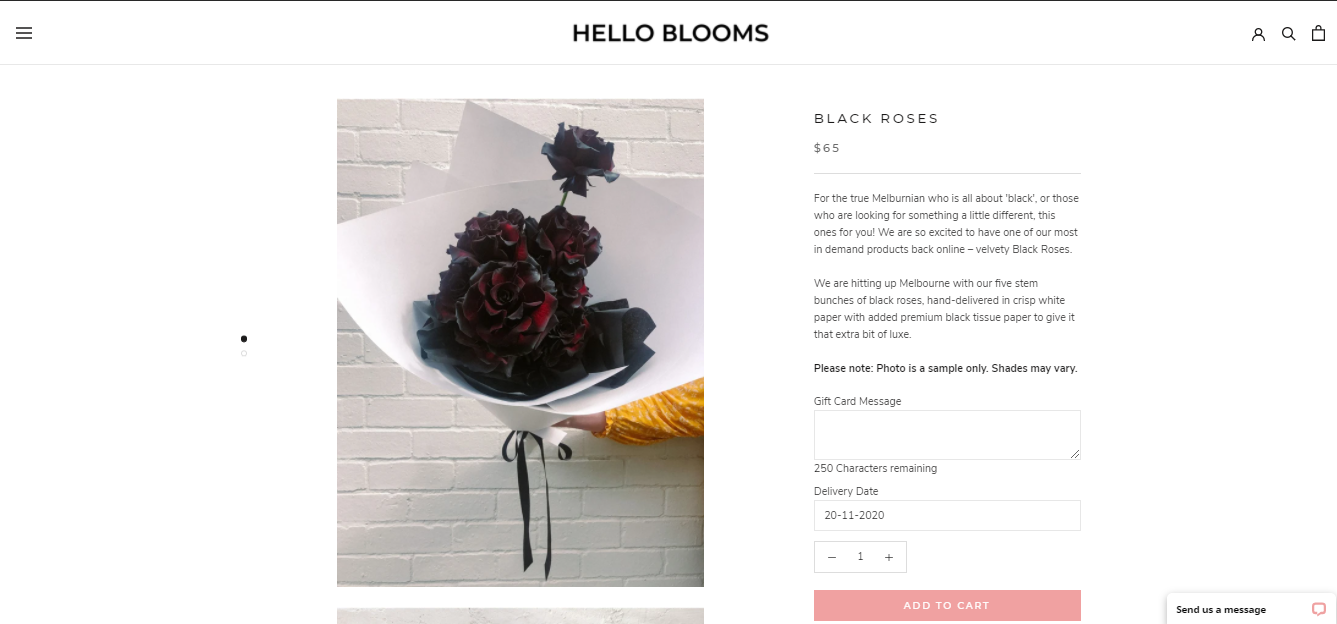
Hello Blooms provide not only flowers but also plants with some extra add-ons such as balloons, polaroids, and even doughnuts! They have used the Product Delivery Date Pro plugin to showcase the Delivery Date on their product page. See below how it looks-
5. Product Delivery Date Pro for Hello Flowers from Poland
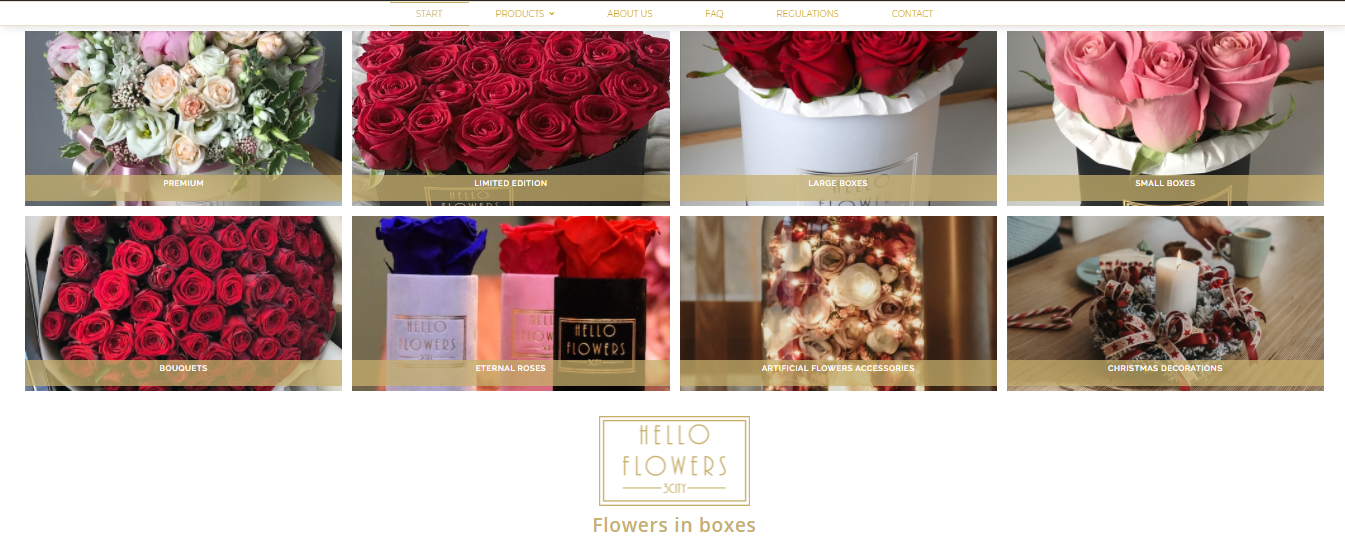
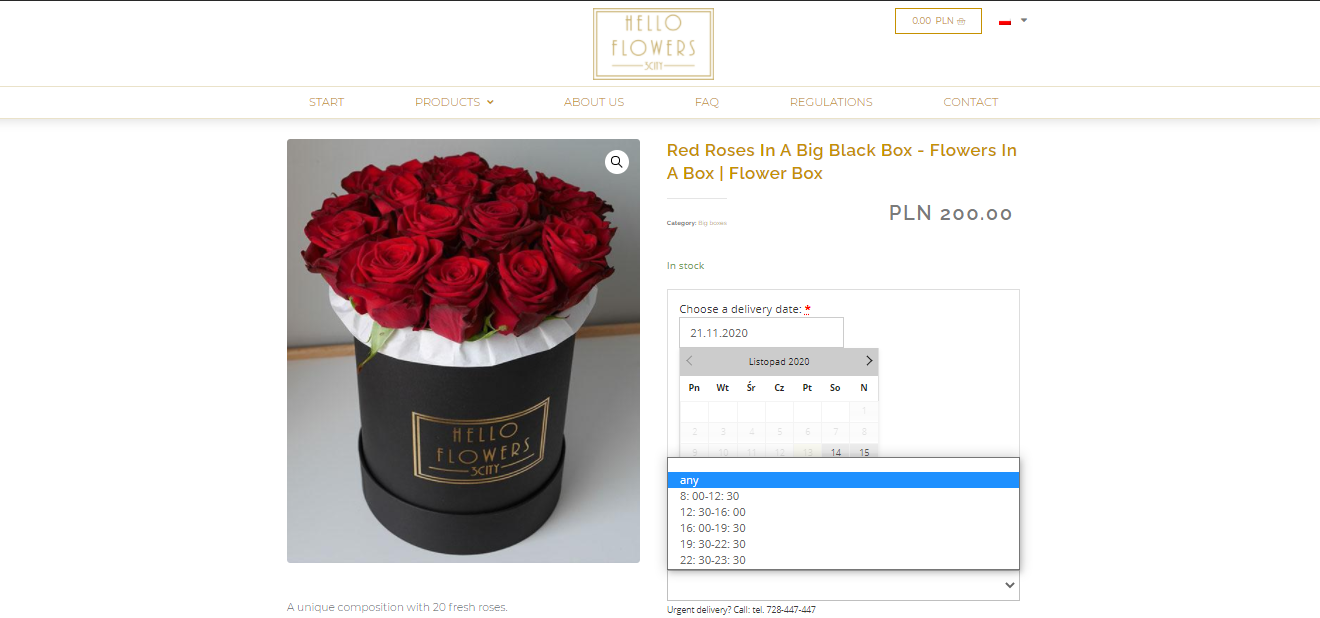
Hello Flowers specializes in offering various things such as Bouquets, flower boxes, Christmas decorations, and even artificial flowers! Their product page showcases both Delivery Date and Time options.
Wrapping up, flower-style!
According to The Society of American Florists, 45% of flowers die before they’re even sold! This scenario is pretty grim and no one but your online flower delivery shop can help change it. A robust and well set up online delivery shop will do wonders for your cause and make your business a blooming one! Set it up today with the help of this post!


It was just a great read. In case you are looking for fresh flowers delivery shop, The Flower Club provides you with the facilities of sending flowers at the door step of your dear ones.