


Toggle switches on product pages are super flexible and can be adapted to suit an online store’s specific needs. Stores typically use toggle switches in sign-up forms, subscriptions, or notifications input fields.
In this WooCommerce customization, we are placing the toggle switch input field to let customers subscribe to price drop notifications. This will allow customers to receive messages when prices go down and keep them engaged with your products even after they’ve left your site. This will increase the chances of them returning to make a purchase when the price aligns with their expectations. Let’s explore how to add a toggle switch to your WooCommerce product page with a handy snippet!
Solution: Add Toggle Switch as Product Input Field on WooCommerce Product Page
The code adds a toggle switch to product pages allowing customers to easily subscribe/unsubscribe to price drop notifications for the products they wish.
// Add Toggle Switch to WooCommerce Product Page
add_action( 'woocommerce_before_add_to_cart_button', 'ts_add_toggle_switch_to_product_page' );
function ts_add_toggle_switch_to_product_page() {
    ?>
    <style>
        /* CSS for Toggle Switch */
        .toggle-switch-field {
            text-align: left; /* Align content to the left */
            margin-bottom: 20px; /* Add margin at the bottom */
        }
        .toggleButtonHandles {
            display: flex;
            align-items: center;
        }
        .toggleButton {
            position: relative;
            display: inline-block;
            width: 60px;
            height: 34px;
            margin-right: 10px; /* Add some spacing between the toggle switch and the text */
        }
        .toggleButtonSwitch {
            padding: 0 10px;
        }
        .toggleButton input {
            opacity: 0;
            width: 0;
            height: 0;
        }
        .slider {
            position: absolute;
            cursor: pointer;
            top: 0;
            left: 0;
            right: 0;
            bottom: 0;
            background-color: #ccc;
            transition: .4s;
        }
        .toggleContent {
            display: none;
        }
        .toggleContent.active {
            display: block;
        }
        .slider:before {
            position: absolute;
            content: "";
            height: 26px;
            width: 26px;
            left: 4px;
            bottom: 4px;
            background-color: white;
            transition: .4s;
        }
        input:checked + .slider {
            background-color: #2196F3;
        }
        input:focus + .slider {
            box-shadow: 0 0 1px #2196F3;
        }
        input:checked + .slider:before {
            transform: translateX(26px);
        }
        .slider.round {
            border-radius: 34px;
        }
        .slider.round:before {
            border-radius: 50%;
        }
        .afterToggleLabel {
            font-size: 26px; /* Increase font size */
        }
    </style>

    <div class="toggle-switch-field">
        <div class="toggleButtonHandles">
            <div class="toggleButtonSwitch">
                <label class="toggleButton">
                    <input type="checkbox">
                    <span class="slider round"></span>
                </label>
            </div>
            <div class="afterToggleLabel">Send Notification on Price Drop</div>
        </div>
    </div>

    <script>
        // JavaScript for Toggle Switch Functionality
        jQuery(document).ready(function($) {
            $( '.toggleButton input' ).click(function() {
                $('.toggleContent').toggleClass('active');
            });
        });
    </script>
    <?php
}
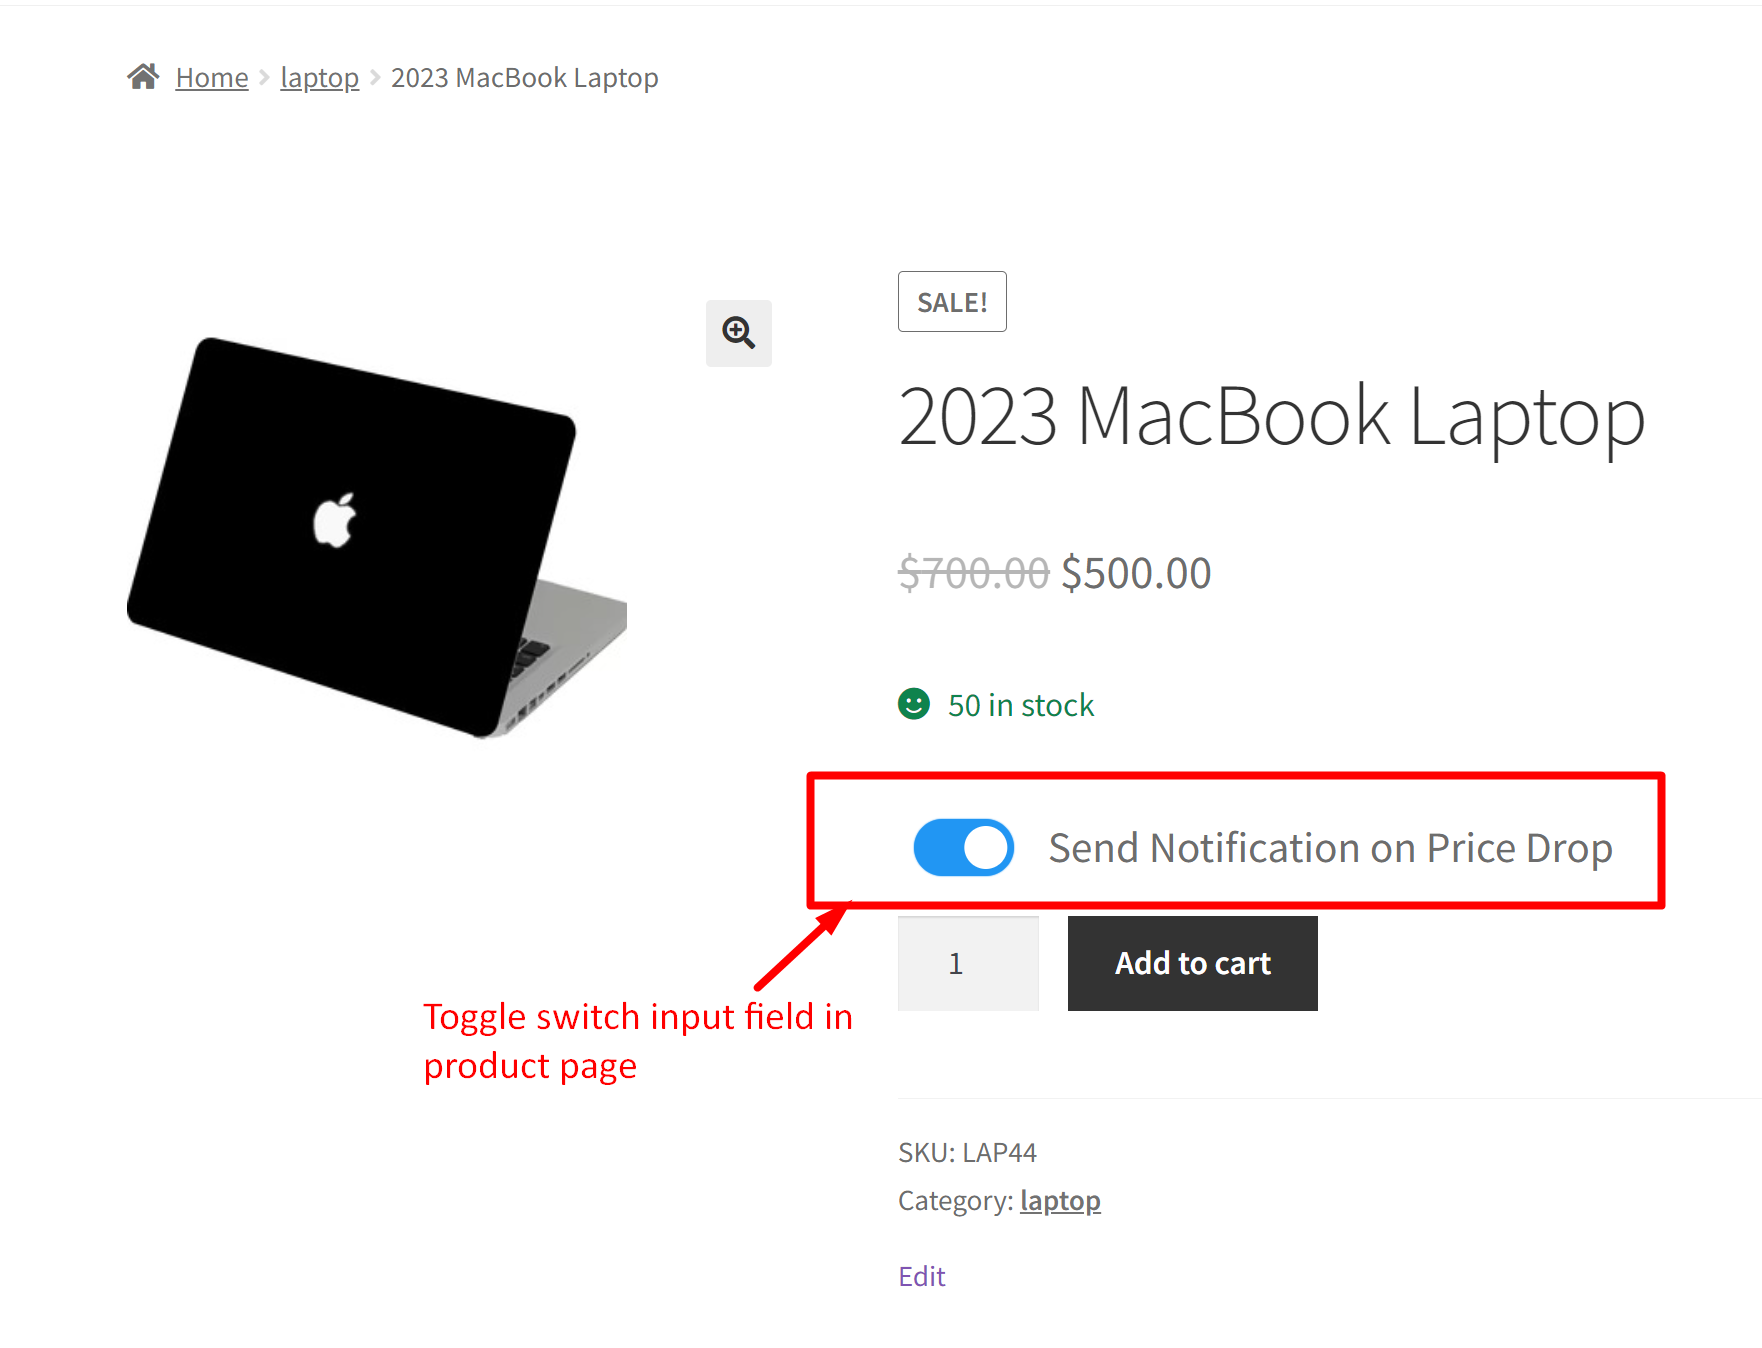
Output
When a customer checks out the product page, they’ll see a toggle switch labeled as “Send Notification on Price Drop.” They can choose to turn it on or off, depending on what their preference.

Just like toggle switches, you can also customize the WooCommerce product page by adding checkbox as custom input fields. These features help you gather important customer information and keep them engaged, increasing your chances of making a sale.


