Today we shall discuss on how stock management is handled within Booking & Appointment plugin for WooCommerce. Firstly let us understand what do you mean by stock management in our plugin.
We have discussed all the different booking methods in our earlier posts. In each of these methods we had to always set maximum bookings setting before saving the product. This setting showcases how many bookings are available for the selected duration and depending on the values saved, the bookings are taken for that product/service on the front end.
Thus our own stock management system allows store admins to set stocks of product/services and manage them efficiently.
Note: Do not use Stock Management of WooCommerce here, we have our own Stock Management System in place.
Today we would like to discuss this functionality for all 3 booking methods together in one post, so as to have a complete knowledge of how maximum bookings work in our plugin.
So let us start by taking each booking method and understanding maximum booking functionality:
Single Day Booking
This refers to as Recurring Weekdays where a service can be booked for full day and any weekday. Let us see how to setup single day booking and its maximum bookings.
We will add maximum booking settings for product Party Hall where the hall can be booked for maximum of 20 bookings for a day.
Admin Section:
The first step will be creating a product from the Products -> Add Product link. Create Party Hall Bookings product for customers to book the hall for a single day.
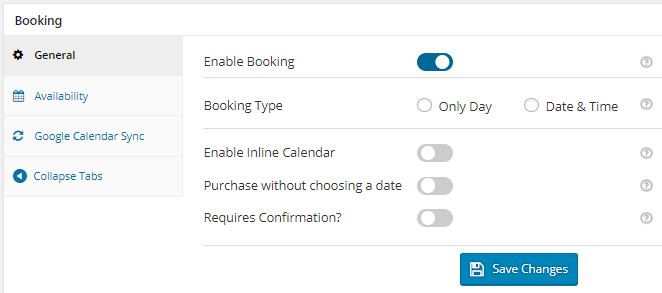
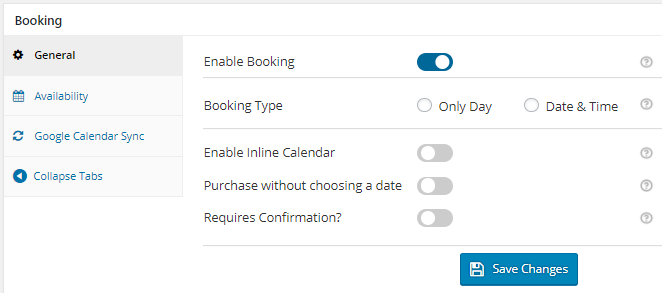
On the same page, you will also find the Booking Meta Box that allows you to setup your bookable product. Enable bookings by clicking the Enable Booking option as shown below:

Enable Booking Option
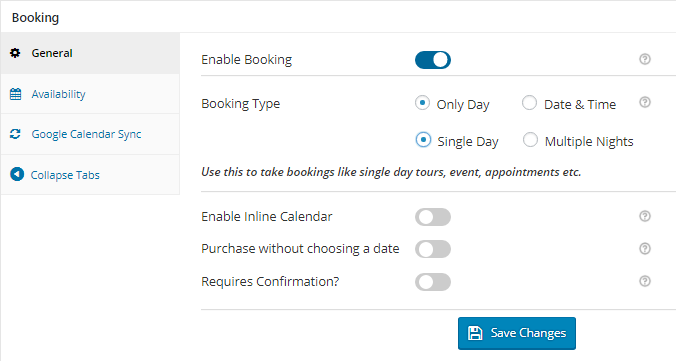
Now select Booking type as Only Day and you will notice that further two options namely Single Day and Multiple Nights, gets displayed. Here select Single Day as shown below and click on Save Changes button.

Selecting Single Day option
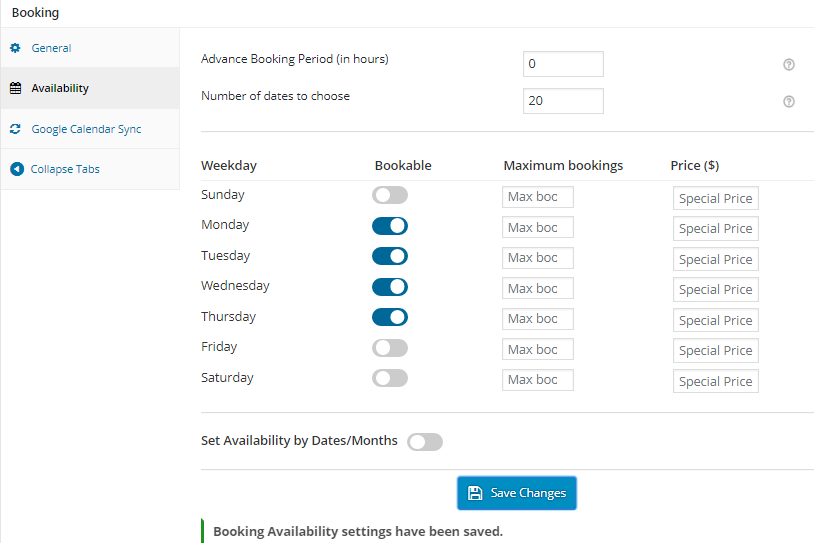
Now you need to add the days when this hall will be available on rent, for this go to Availability tab where you need to enable the weekdays from the Weekdays table as shown below:

Enabling weekdays for Booking
We have set the availability for Party hall for all Mondays, Tuesdays, Wednesdays and Thursdays as shown above.
Once this is done, add maximum bookings that can be taken for these selected days. As you can see in below screenshot there is Maximum bookings column in the Weekdays table. Here you can set the maximum bookings can be made on a day. We have added maximum of 20 bookings for all Mondays, Tuesdays, Wednesdays and Thursdays as shown in the below screenshot. These can be changed as per your requirement at any time.

Maximum bookings & price added
Thus selected weekdays with its maximum bookings will be showcased on the front end facilitating customers to select their desired day for booking.
Front End:
The Party Hall Bookings product will appear on the front end of the website like shown in the below screenshot.

Party Hall Bookings product
Here you can select a desired day and add the booking to the cart. Once you select the day, the Add to Cart button on Cart page will be enabled. We have selected 22nd March, 2018 for the booking as shown below:

Day selected for Booking a Hall
As you can see, once the date is selected in the booking calendar, the maximum bookings available for that day gets displayed. Here the message 20 bookings are available on 03/22/18 appears above the Select Date option as shown above.
Say we complete our booking for this date and book the hall for 3rd March, 2018. Now if we go back and select this same date in the booking calendar, the number of available bookings for that day will be shown as 19 bookings available as shown below:

Available bookings displayed as 19 for 03/22/18
This is because we already booked the hall for 3rd March, 2018, so only 19 bookings will be allowed for that date now. Thus, this is how maximum bookings for Single Day booking works as discussed above.
Multiple Nights Booking
Let us see how setting maximum bookings work for Multiple Nights Booking. We will add maximum booking settings for product Hotel Sinclair, Ooty where maximum of 30 bookings for the hotel can be taken for any given date.
We will discuss the backend (Admin Section) and Front end sections seperately as below.
Admin Section:
Here we will create a product Hotel Sinclair, Ooty and take bookings for 3 nights. For this let us create the product from the Products -> Add Product link.
On the same page, you will also find the Booking Meta Box that allows you to setup your bookable product. Enable bookings by clicking the Enable Booking option as shown below:

Enable Booking settings
By enabling this setting, you can convert your normal WooCommerce product into a bookable product.
Now select Booking type as Only Day, upon which further two options will be displayed. Select Multiple Nights option as shown below and click on Save Changes button.

Select Booking Type as Multiple Nights
Now you will need to add settings for making the hotel rooms available for booking. In the Availability tab, you can set availability of your product along with the maximum bookings on a day.

Default Availability settings for Multiple Nights
As you can see, all the weekdays are by default enabled and Maximum Bookings On Any Dates is 60, so let’s set it to 30 as we want only 30 bookings on a particular date. Click on Save Changes button to save the availability setting for this product.

Selecting bookable weekdays and maximum bookings settings
Here as you can see, we have selected all Weekdays as bookable and maximum bookings for each bookable date is set to 30 as shown above.
Thus selected weekdays with its maximum bookings will be showcased on the front end facilitating customers to select their desired day for booking.
Front End:
The product Hotel Sinclair, Ooty appears on the front end of the website as shown below:

Product displayed on front end
When you select the hotel for 3 nights, its maximum number of bookings available for that date gets displayed. We have set the maximum bookings to be taken for each day as 30, hence the message 30 bookings are available on 03/09/18 as shown above.
As we saw in Single Day booking method, when the hotel room is booked for particular dates, its maximum availability will keep decreasing for those selected dates. This is how maximum bookings work for Multiple Nights booking.
Date & Time Slot Booking
On similar terms as discussed in Single Day and Multiple Nights booking, let us see how we can set maximum booking settings for Time Slot booking.
Let us take an instance of booking an appointment with a doctor where he is available from Monday to Thursday and his time slots would be 10am to 2pm and in the evening between 4pm to 7pm on these weekdays. Let us create this product Dr. Phil’s Clinic that will book maximum of 20 appointments for visiting the doctor.
Admin Section:
The first step will be creating a product from the Products -> Add Product link.
On the same page, you will also find the Booking Meta Box that allows you to setup your bookable product. Enable settings in Booking Meta box by clicking the Enable Booking option as shown below:

Enable booking option
Now select Booking type as Date & Time as shown below and click on Save Changes button.

Selecting Date & Time option
Lets add weekdays when the doctor will be available along with the time slots for booking appointments, which can be done from the Availability tab.
First select the days from Weekdays table and also add the maximum number of appointments that can be taken on that day as shown below:

Select Weekdays for booking appointments
We have set maximum bookings for all Mondays. Tuesdays, Wednesdays and Thursdays as 20 bookings.
Now let us add the timeslots for booking appointments from Set Weekdays/Dates & It’s Timeslot table. The selected weekdays will appear and you can add different timeslots for each weekday as shown below. Click on the Save Changes button to save these settings.

Add Timeslots for booking appointments
Maximum Bokings field allows you to set maximum appointments for that particular timeslot. Once the threshold is reached, the timeslot is locked for taking further bookings.
Thus selected weekdays and timeslots along with its maximum bookings will be showcased on the front end for customers to make bookings.
Front End:
The newly created product to take bookings for Dr. Phil’s Clinic will appear on the front end of the website like shown in the below screenshot.

Product displayed on the front end with date selected
As you can see, you are asked to first select the date for booking an appointment. We have selected date as 22nd February, 2018. Once date is added, maximum bookings for that date will be displayed as shown above. Since the maximum bookings are set to 20, the message 20 bookings are available on 02/22/18 is displayed as shown above.
Now when you select the Booking Time from the added time slots, the availability would change. This means when we select the time slot as 10am – 2pm, the maximum availability for that time slot is half of the maximum availability of the day because there are 2 time slots added for the day.
Therefore the message that is displayed once the time slot 10am – 2pm is selected, is 10 bookings are available for 10:00 AM – 02:00 PM on 02/22/18 as shown below:
 Maximum availability displayed
Thus for Date & Time Slot booking method, maximum bookings set for the day gets divided into the number of time slots added for that day. This is how maximum availability settings work for Date & Time Slot bookings.
Validation
Considering the instance we discussed in Single Day booking where we can book the party hall on rent, we will understand how bookings are handled when maximum bookings threshold is reached.
So say we have maximum bookings for Party Hall Bookings product set to 20 bookings and we have booked all 20 bookings for the selected date which is 28th February, 2018.
Now when we select this product on the front end and select the date 28th February, 2018, this date will appear as disabled and message as Booked will appear as shown below:

The date appears disabled when fully booked
This is because the maximum availability of the hall for 28th February, 2018 was reached and hence no further bookings can be taken. So the date appears disabled on the booking calendar, restricting overbooking of the hall.
Lockout Limit for Variable Products and Attribute Value
You can also set maximum bookings limit for each variation of different Variable products of WooCommerce. To understand how this works in full depth, please read our earlier post.
Moreover, this plugin also provides the ability to consider attribute values as Quantity and allows to setup lockout for the same. You can have a look at our Attribute Level post to know more about it.
Conclusion
In this post we saw how maximum bookings can be set for major 3 booking methods namely Single Day, Multiple Nights and Date & Time Slot bookings provided by our Booking & Appointment plugin for WooCommerce. Also we discussed about Variable products and Attribute values for setting maximum bookings.
This setting plays a vital role in managing stock of product or services for online businesses. Hence using it in a right way will help customers boost their overall online sales.


