


What if your WooCommerce store could display only the fields that matter, based on what the customer selects?
That’s where WooCommerce Conditional Logic for custom product fields comes in. It helps you keep your product pages clean, relevant, and user-friendly by dynamically showing or hiding fields based on what the customer selects.
Whether you’re selling personalized birthday cakes or pizzas with extra toppings, our Product Input Fields for WooCommerce plugin makes it easy to display relevant fields only when needed. For example, imagine displaying a dropdown of pizza types only if the product belongs to the ‘pizza’ category. This conditional logic feature is now available as part of the latest update to our plugin.
Let’s explore how this works and look at some real-world examples you can apply right away.
How to Use WooCommerce Conditional Logic in Product Input Fields (Per Product Level)
Let’s go to a specific product page. For example, a birthday cake product that has 2 product input fields.
- A Radio Button field labeled “Add a personalized message?” with options Yes and No.
- A Text Field where the customer can type their message.
Now, apply conditional logic to the Text Field so it only appears when the customer selects “Yes” in the radio button field.

On the frontend of the Birthday Cake product page, users will first see a “Would you like to add a personalized message?” option. If they choose “Yes,” a text box appears where they can type their message.
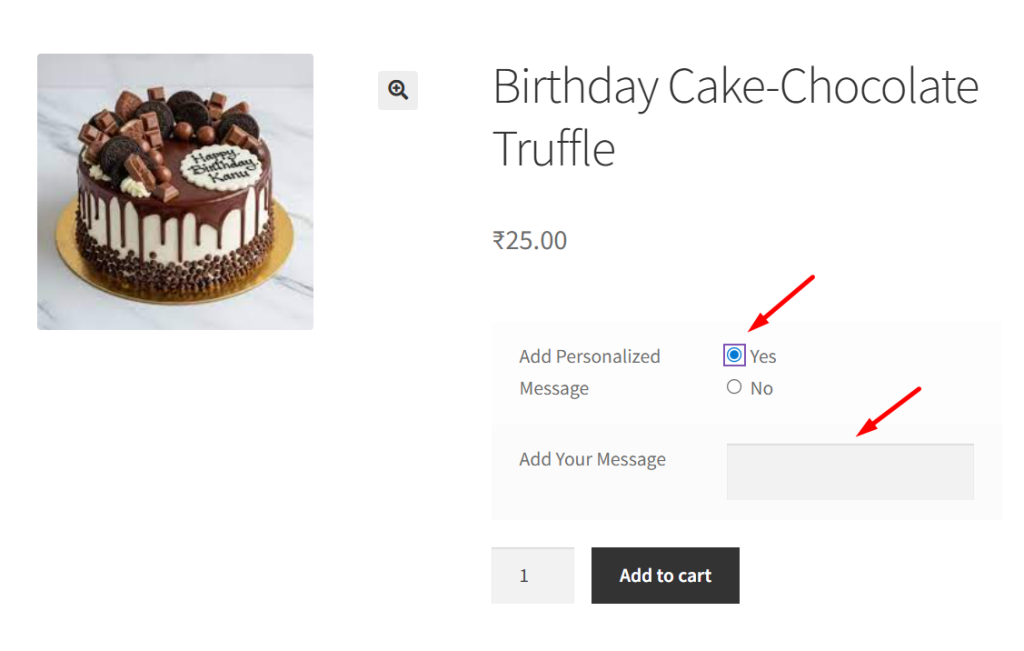
If they select “No”, the text box remains hidden.

How to Use WooCommerce Conditional Logic in Product Input Fields (Globally)
To apply Conditional Logic, you need to configure it within the specific input field settings. For example, if you’re editing Product Input Field #1 under the All Products tab, the logic will apply globally across all products.
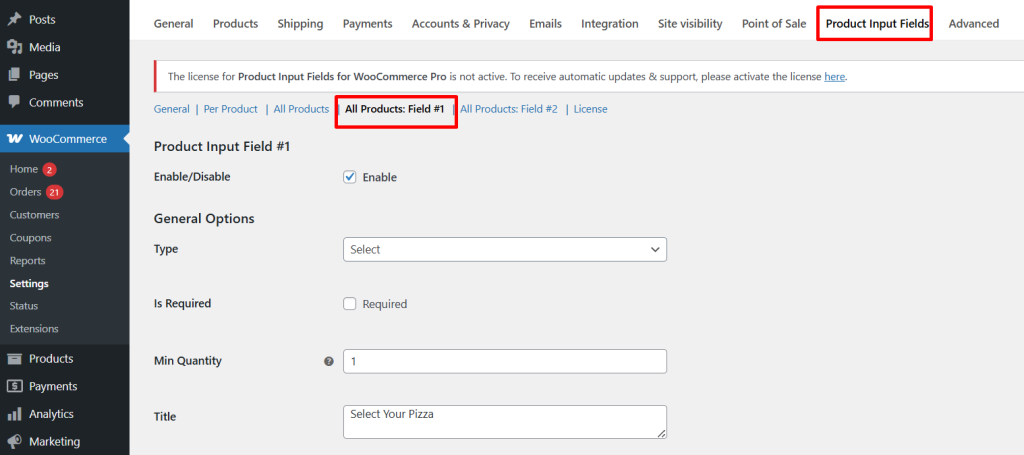
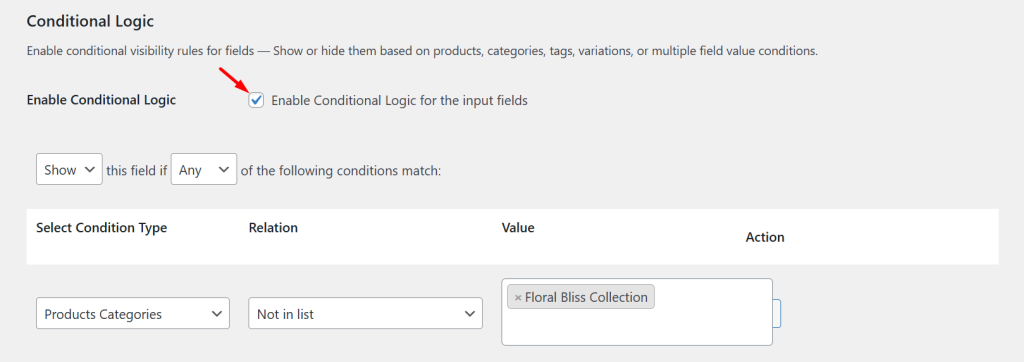
Scroll to the bottom of the settings for this product input field # 1, and you’ll see the section titled “Conditional Logic”. Once enabled, it will unlock a new set of options that let you control when and how that field appears on the product page.
Show Fields Based on Selected Categories and Input Choices
Let’s say you run an online ordering system for a restaurant that sells a variety of items like pizzas, appetizers, beverages, and desserts. You want to give your customers additional choices, but only for a specific category.
Here’s how you’d configure this in the Product Input Fields for WooCommerce plugin:
To show or hide fields based on specific product selections, first enable Conditional Logic and set the condition type to Product Categories, such as Pizza.
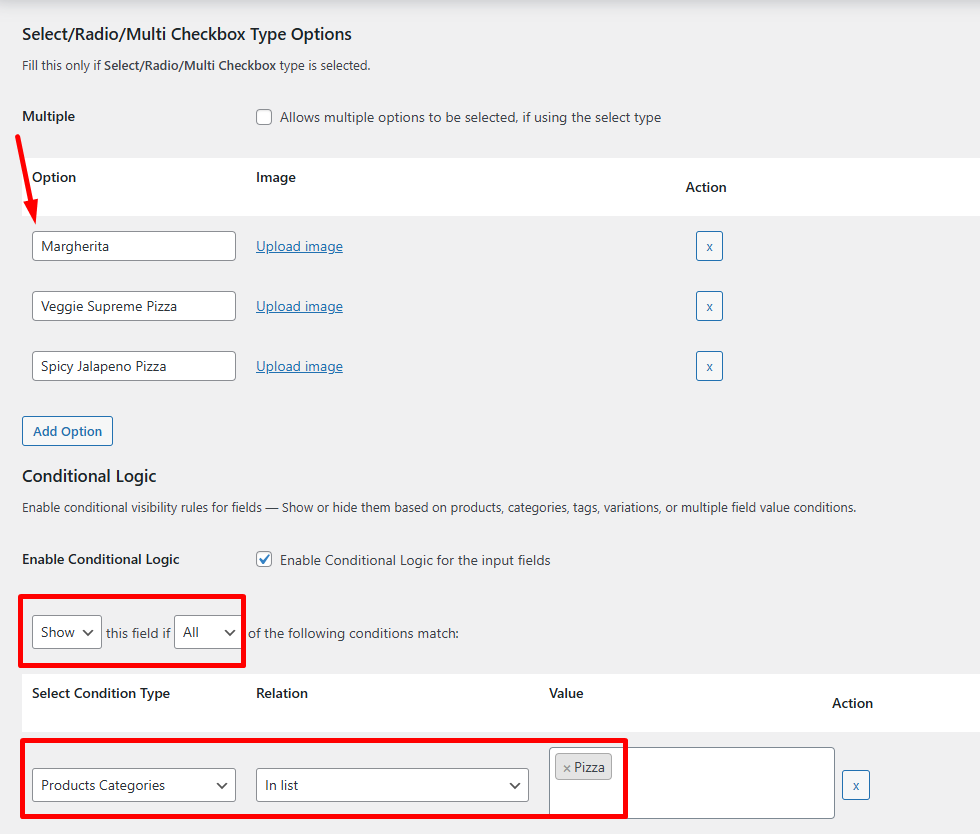
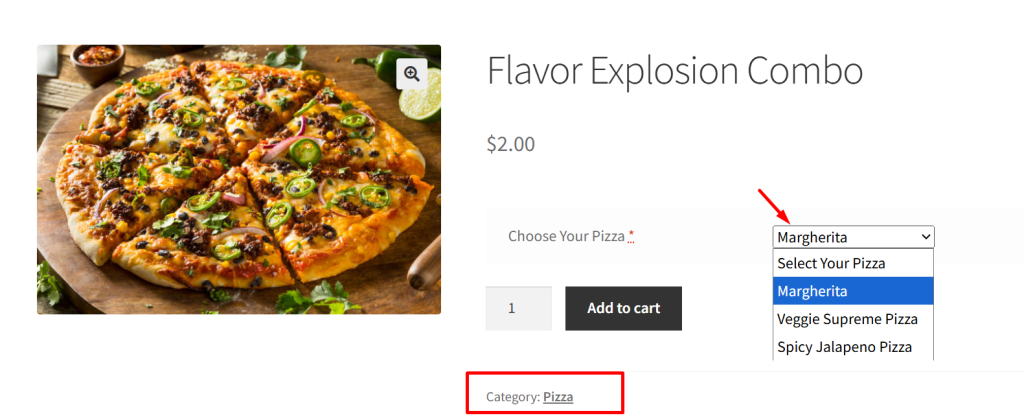
When a customer views any product from the ‘Pizza’ category, they’ll see the dropdown titled “Select Your Pizza”, with all available select options.
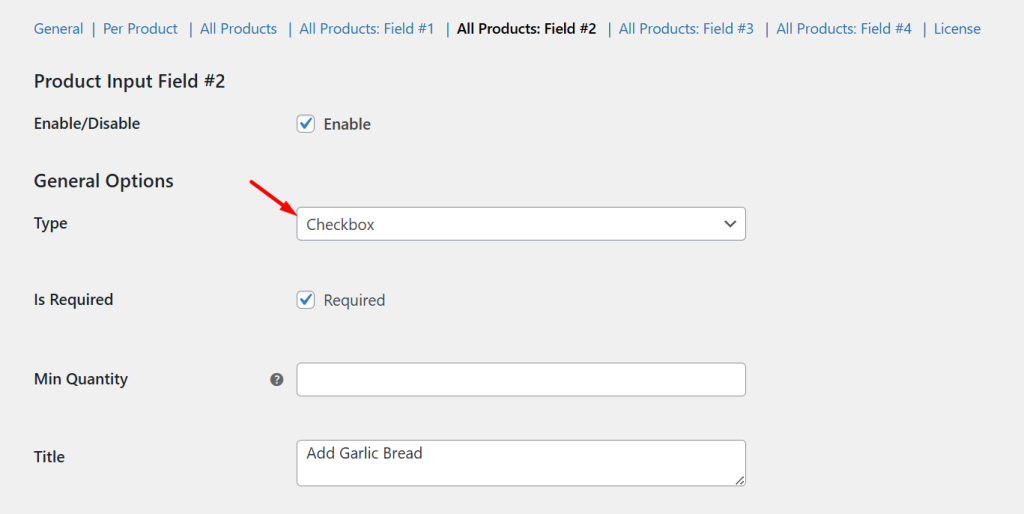
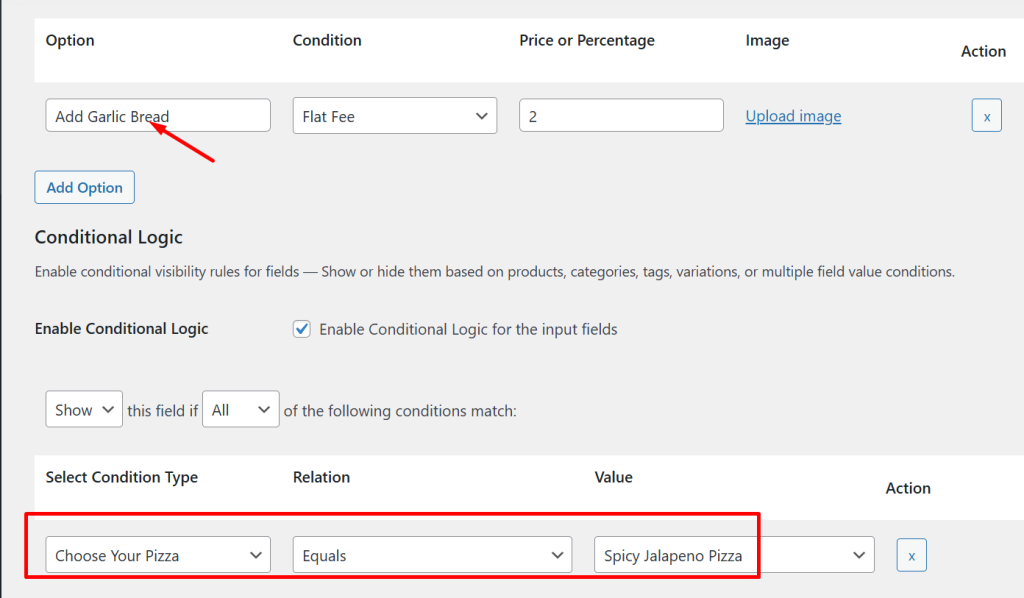
Now let’s take it a step further with nested conditions. Suppose you want to display a checkbox labeled “Add Garlic Bread ($2)”, but only when a customer selects a specific pizza from the “Choose Your Pizza” dropdown. You can achieve this using Conditional Logic based on another input field value.
Conditional Logic is enabled for this checkbox so that it only appears when the customer selects “Spicy Jalapeno Pizza” from the “Choose Your Pizza” dropdown field.
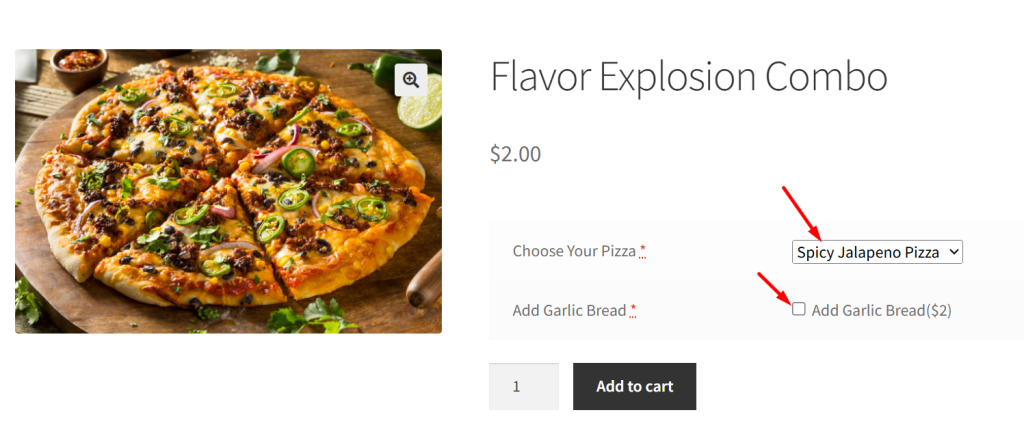
On the frontend of the product page, once the user selects Spicy Jalapeno Pizza, the conditional logic triggers, and the “Add Garlic Bread ($2)” checkbox becomes visible. This gives customers an add-on option based on their selection.
Additionally, you can set nested conditions not just based on input field values, but also based on specific products, product tags, and even product variations, giving you complete control over the field shown on the product page based on the user’s selection.

